How To Add Multiple Locations To Google My Business

Managing multiple business locations is a great sign of growth, but it also comes with the challenge of maintaining a strong and consistent online presence. If your locations aren’t showing up correctly on Google Search or Maps, you could be missing out on valuable foot traffic and local customers.

Google Business Profile (formerly Google My Business) makes it possible to add and manage all your locations under one account. In this blog, we’ll walk you through how to do it the right way, step by step, so each branch is easy to find, has accurate information, and contributes to your overall visibility.

Whether you’re just getting started or looking to clean up your existing listings, this guide will make the process simple and effective.

Before You Begin: Checklist for Adding Multiple Businesses to GBP

Google rewards those businesses that appear well-structured and organized from the start. So, before you go on with the “Add Multiple Location” process, there are a few essential requisites to keep in mind:

Add Multiple Locations on GBP (For 10 or Fewer Listings)

Google mandates that you create a Business Group (formerly a location group) for more efficient management if you oversee more than ten locations.

Step 1: Enter your email address to access Google Business Profile Manager.

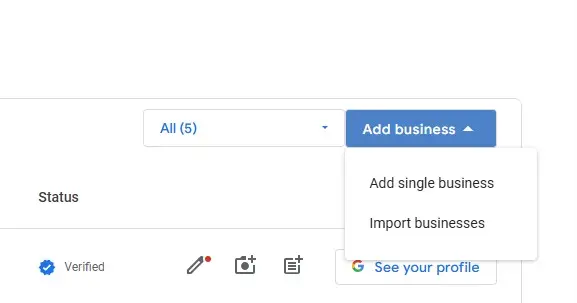
Step 2: Select Add single business from the dashboard menu.

Google Business Profile Manager dashboard with ‘Add single business’ option highlighted

Step 3: Provide correct information, including the address, category, and business name. Make sure that NAP (Name, Address, Phone) is consistent.

Step 4: If you serve clients outside your physical location, add service areas.

Step 5: Google will ask you to confirm each location by phone, email, video recording or postcard.

Step 6: After verification, add services, photos, hours, and a special description to your listing to increase visibility.

Bulk Upload Locations with a Spreadsheet (For 10 or More Listings)

If your business operates in ten or more locations, Google allows you to add locations in bulk using a spreadsheet. This strategy works well and is recommended for quickly growing franchises, chains, and businesses.

Step 1: Log into Google Business Profile Manager first.
In Google Business Profile Manager, select Add businessImport businesses.

Google Business Profile Manager menu showing ‘Add business’ → ‘Import businesses

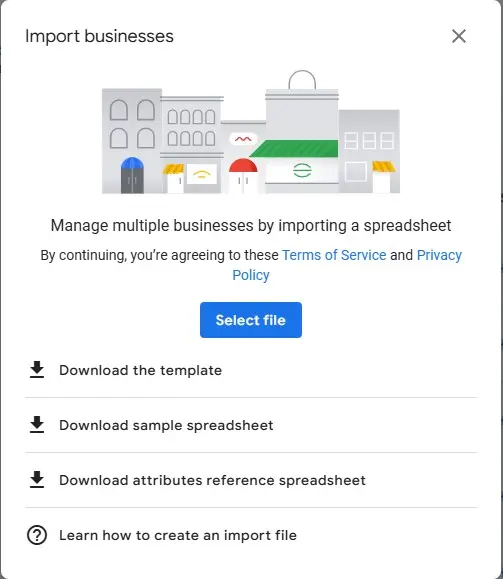
Step 2: Download and utilize the official template:

Click Download the template to get Google’s bulk upload sheet. The following are some of the mandatory fields:

  • Name of business
  • Address
  • Telephone
  • Web page/Website
  • Primary Category
  • Hours (if any)

Bulk upload template in Google’s sheet with Instructions tab visible

💡 Pro tip: To guarantee proper formatting, use the file’s Instructions tab.

Step 3: Fill out the location information. Provide accurate and consistent data. Ensure consistency of NAP (Name, Address, Phone) on your website and other listings.

Step 4: Submit the completed file. Google will check for missing fields, and once resolved, you’ll need to upload it again.

Step 5: If eligible, request bulk verification using Google’s form. You must manage all locations and ensure they follow a uniform format.

Google Business Verification for Multi-Location Setups

Every business location must be validated before appearing on Google Maps and Search. The number of locations and the structure of your company will determine the approach. However, before you start with the verification process, there are two crucial things to keep in mind:

  • Google will automatically decide and show the verification methods available for your businesses.
  • Sometimes, you are asked to verify your business using multiple methods.

Postcard Verification: Google mails a code to your business address. Ideal for one or two new locations. It usually takes about 5–14 days for the postcard to arrive. Make sure the staff is aware of the address and can see it.

Email or phone Verification: Only accessible if Google determines that your company qualifies, which is typically the case for verified profiles. Once you receive the phone call or email, this verification method is an “Instant” one. Ensure that your details are the same as your listing.

Bulk Verification: Use the bulk verification form to apply if you oversee more than ten locations under a single brand and satisfy Google’s requirements. This process ideally takes 1–2 weeks for approvals.

Video or Live Call: Google occasionally asks for a live call or video demonstration. To expedite approval, carefully follow their instructions. This verification process takes a few minutes to a couple of days.

To minimize verification problems, keep your company’s information the same in all locations.

How to Manage Multiple Locations with Business Groups

Managing multiple Google Business Profiles can be daunting as your business grows. Business Groups, often known as Location Groups, can help you streamline the management of multiple listings under one framework. Hence, it allows you to consolidate locations and makes it easy to handle operations without involving teams and departments.

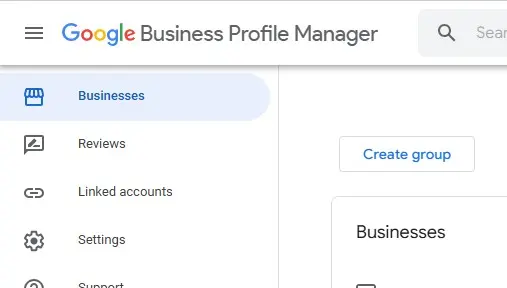
How to Create a Business Group in Google Business Profile Manager

  • Log in to your Google Business Profile Manager.
  • Click Businesses from the menu on the left.
  • At the upper right, select Create group.
  • Google Business Profile Manager with ‘Create group’ button in top-right corner
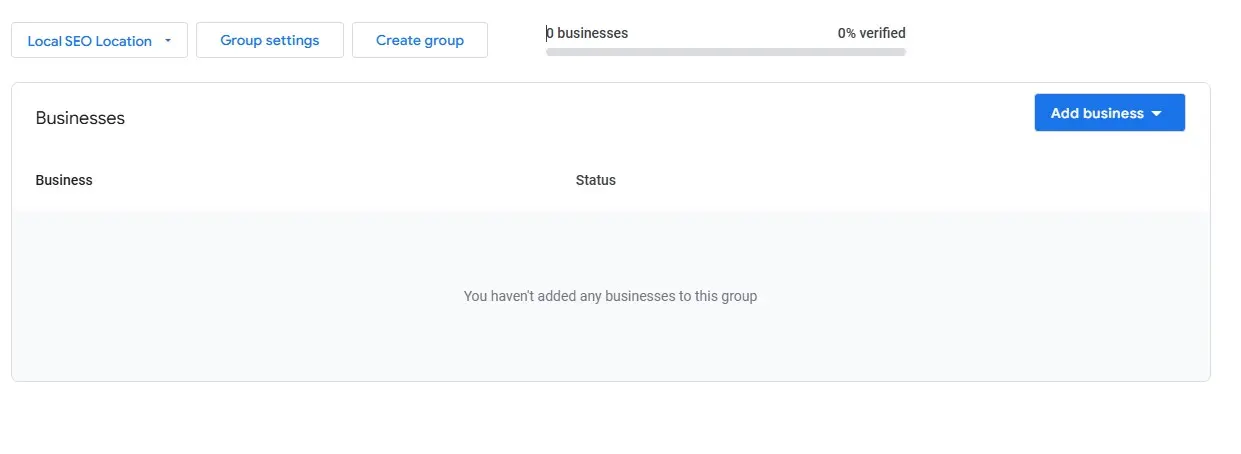
  • Name something easily identifiable for your organisation, like “East Coast Stores” or “Franchise Locations.”
  • After it is created, you can use it to add new locations in the future or begin adding locations that already exist to this groupNewly created Business Group page showing option to add existing locations
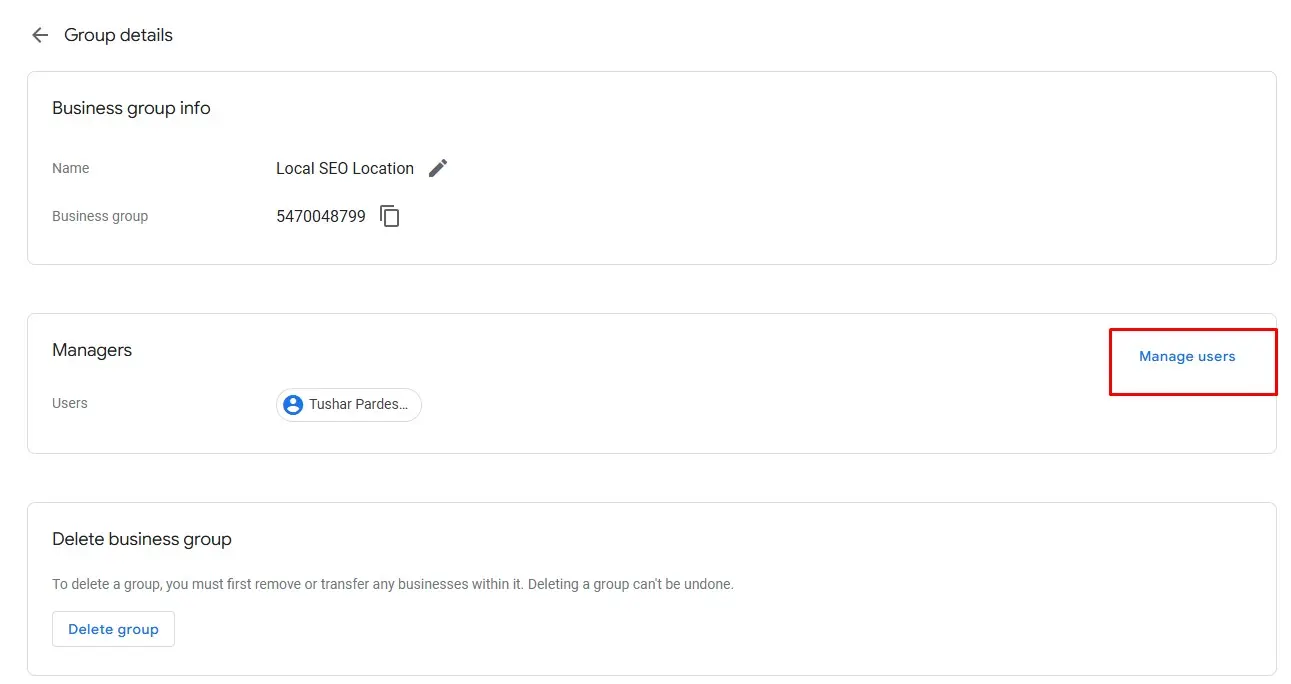
  • Going to the group’s settings and appropriately allocating roles (Owner, Manager, and Site Manager) is another way to control user access.Business Group settings interface with Owner, Manager, and Site Manager role assignments

Managing Multiple GBP Listings with GMB Briefcase

  • You can easily edit information, update listings, and track local rankings with GMB Briefcase, which allows you to manage all your locations from a single dashboard.
  • It is your central hub for maintaining consistency, accuracy, and optimization across all locations.
  • Check real-time performance data for all locations and generate white-label reports.
  • Automate review responses and manage reviews for all locations on a single platform.
  • Schedule GBP posts for multiple locations at once.
  • Run a GBP audit to identify local SEO issues, find competitor keywords and improve local rankings.

Best Practices for Multi-Location SEO

Optimizing your locations for local search is the next step after they have been set up and validated. Thanks to multi-location SEO, each listing will appear for customers in the right markets.

To efficiently accomplish that:

  • Ensure your NAP is consistent across all platforms, such as Google, your website, directories, and social media.
  • Writing a different business description for each location is essential, showing the local services, customers, and community focus.
  • Using location-based keywords through posts, services, and descriptions improves local relevance and search rankings.
  • Encouraging location-based reviews and responding to them enhances credibility and improves map pack performance.

Be it 1 or 10,000, Manage Your Google Business Profiles with Ease

If you’re working with fewer than 10 locations, manually entering them one at a time is simple and effective. For businesses with 10 or more locations, uploading a spreadsheet can save valuable time and reduce the risk of errors.

To streamline ongoing management, consider using local SEO tools like GMB Briefcase. It allows you to oversee all your locations from a single dashboard, making updates, monitoring, and optimization much more manageable.

Getting your locations listed correctly is a crucial step in strengthening your local rankings and ensuring customers can find accurate information about your business wherever they are.

FAQs about Adding Multiple Locations to GBP

Q1. Do I need a separate email for each location?

Ans: No, you can use a single Google account to manage your locations. To assign and manage user access without requiring multiple logins, use Business Groups.

Q2. Can I have two or more locations on my Google Business Profile?

Ans: Yes, it is easy to manage multiple locations in GBP. To add locations, open Google Business Profile Manager > click Add business, and follow the steps for each location.

Q3. Can I use the same address for multiple Google Business Profiles?

Ans: Yes, you can have multiple profiles at the same address, provided:

  • Each business is a distinct entity.
  • Each business has a unique name.
  • Each business has a separate phone number.
  • Each business has a distinct website.
  • The businesses offer separate services or operations.

If the businesses are part of the same legal entity or offer similar services, they cannot be listed separately.

Q4. Will adding multiple locations affect my main listing’s ranking?

Ans: Absolutely not. If done correctly, each listing can promote local visibility in its area without affecting others.

Q5. How to verify multiple locations on Google Business Profile?

Ans: To verify multiple locations, head to Google Business Profile Manager > Verifications > Chain > Fill and submit the form.

Q6. Can I run ads for each location separately?

Ans: Of course. You can create location-specific Google Ads campaigns for a more focused audience and link straight to specific business listings.